This is an example of how to create a Service Mode Architecture Model Project.
Note: This example uses the IBM Rational Software Architect 7.5 Standard Edition tool to create a Service Mode Architecture specification with applied Service Modes Architectures Profile.
Note: The project below is assumed to be called NewModes, replace ServiceModes with a name of your choice.
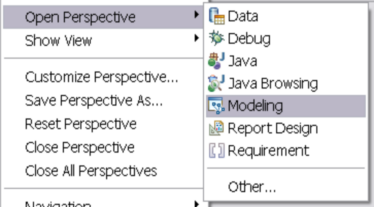
| 1. | In RSA 7.5, switch to the Modeling Perspective |
|
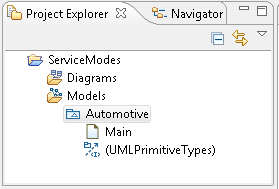
2. Create a new UML Model Project
|
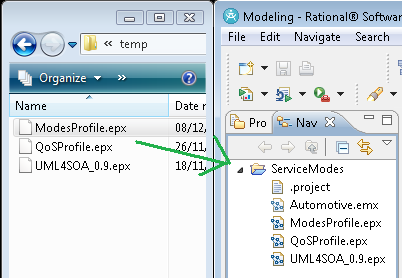
3. Import and apply the Service Modes Architecture profiles
| a. | Switch to the Navigator view |
| b. | From Windows Explorer, locate the Service Modes Architecture profile files and drag-and-drop them on to the NewModes project folder in the Navigator view (as shown below) |
| c. | Switch back to the Project Explorer view and select the NewModes model branch |
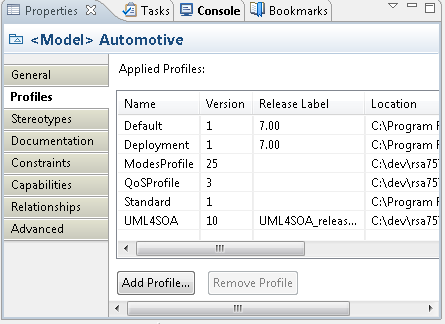
| d. | Locate the model Properties view and select Profiles. |
| e. | On the view select Add Profile à Profile in Workspace àBrowse and select the ModesProfile.epx under NewModes. |
| f. | Repeat e. adding both QoSProfile.epx and UML4SOA_0.9.epx |
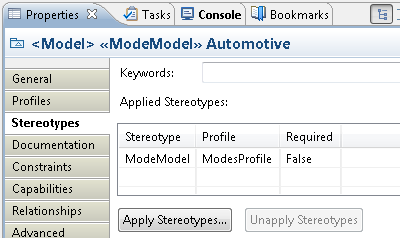
| g. | Switch to the Stereotypes perspective of the model properties. |
| h. | Select Apply Stereotypes select the ModesModel from the ModesProfile profile and click OK. |
| i. | Note that the stereotype is added to the applied stereotypes list. |
4. Save the changes
| a. | Locate the Eclipse menu bar. |
| b. | Select File à Save All. |