The bookPriceFinder example illustrates a simple service broker configuration given a Client (requester) and a bookPriceFinder service (provider).
The example illustrates using one of several book finding services to obtain a book price for a book given it's ISBN reference no. The matching of a particular service is undertaken by the Dino Service Broker given a requirements document generated by WS-Engineer. The requirements document refers to particular service descriptions with their functional and non-functional requirements in a given mode. The client can request that the broker prepares identification and binding to these services and can then invoke the service by requesting that the broker invokes the matched service.
Main Steps
1. Create the BookPriceFinder Service Modes Architecture Model
2. Add a BookPriceFinder Service Grounding
3. Generate the Service Broker Inputs in WS-Engineer
4. Create a Dino Broker Session
5. Invoke a Test on the BookPriceFinder Service
Step Details
| 1.1. | Create a new UML2 Modes Model project as described here. |
| 1.2. | Add a new default mode (package) and default ModeCollaboration as described here. |
| 1.3. | In Project Explorer, select the new Mode default package and right-click to show the context pop-up menu. |
| 1.4. | Select Add UML à Component. Rename the new component as Client. |
| 1.5. | In Project Explorer, select the new Mode default package and right-click to show the context pop-up menu. |
| 1.6. | Select Add UML à Component. Rename the new component as BookPriceFinder. |
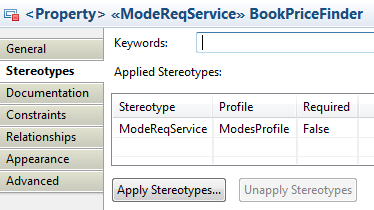
| 1.7. | Select the new BookPriceFinder component and switch to the Stereotypes section of the Properties view. |
| 1.8. | Click Apply Stereotypes and enable the ModeReqService from the ModesProfile and click OK. |
| 1.9. | Open the DefaultComposite diagram under the DefaultCollaboration node. |
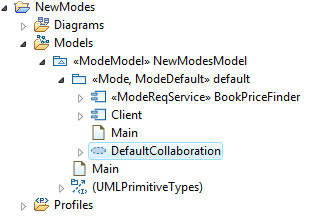
| 1.10. | Drag and drop the Client and bookPriceFinder components on to the diagram editor. |
| 1.11. | Notice that two new properties are added under the DefaultCollaboration node. |
| 1.12. | On the diagram editor select the bookPriceFinder component, right-click and select Add UML à Port. |
| 1.13. | Select Create Class and name the class bookInfo. |
| 1.14. | Locate the Palette tool box on the right of the diagram and select Provided Interface under Composite Structure. |
| 1.15. | Drag the new Provided Interface to the bookInfo port created it step 15 and select Create Interface. Note that a new Interface (Interface1) is added to the bookPriceFinder component in the default package. |
| 1.16. | Locate the new interface under the bookPriceFinder component and rename it to bookInfoInterface. |
| 1.17. | Select the bookInfoInterface, right-click and select Add UML à Operation. Rename the operation getPrice. |
| 1.18. | On the diagram editor select the Client component, right-click and select Add UML à Port. |
| 1.19. | Select unspecified and rename the new port bookSearch. Note that a new class is created (Class1) under the Client component in the mode package. Rename the new class to be called bookSearch. |
| 1.20. | Locate the Palette tool box on the right of the diagram and select Required Interface under Composite Structure. |
| 1.21. | Drag the new Required Interface to the bookSearch port created it step 15 and select Select Existing Element. |
| 1.22. | Search for the interface bookInfoInterface and click OK. |
| 1.23. | Locate the Palette tool box on the right of the diagram and select Connector under Composite Structure. |
| 1.24. | Drag the connector to the bookInfo port on the bookPriceFinder component, and then select the bookSearch port on the Client component. A new connector should be created linking the ports. |

| 2. | Add a BookPriceFinder Service Grounding |
| 2.1. | In Project Explorer, select the BookPriceFinder component and right-click to show the context pop-up menu. |
| 2.2. | Select Add UML à URL. Enter the URL as an internet location or local file pointing to the OWL-S document (xml) for the BookPriceFinder service. |
| 2.3. | Select the new URL comment and switch to the Stereotypes section of the Properties view. |
| 2.4. | Click Apply Stereotypes and enable the ModesBrokerGrounding from the ModesProfile and click OK. |
| 3. | Generate the Service Broker Inputs in WS-Engineer |
| 3.1. | Switch to the WS-Engineer Perspective or show the WS-Engineer view from the Windows à Show View à Other à LTSA WS-Engineer à WS-Engineer. |
| 3.2. | Locate or open the Navigator View (Windows à Show View à Other à General à Navigator). |
| 3.3. | Drag and drop the model.emx file (e.g. NewModes.emx) on the WS-Engineer View. |
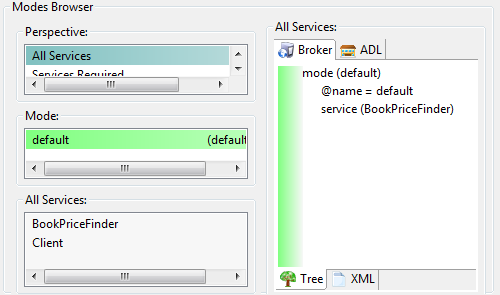
| 3.4. | Note that the modes and services are populated in the Modes Browser. |
| 3.5. | Select the store documents |
| 3.6. | Select an existing (or create) a folder to store the broker requirements documents. |
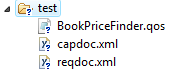
| 3.7. | Click OK to generate the documents. Note that the directory now contains three files. |
| 4. | Create a Dino Broker Session |
| 4.1. | Locate or open the Dino Console View (Windows à Show View à Other à Dino à Dino Console View). |
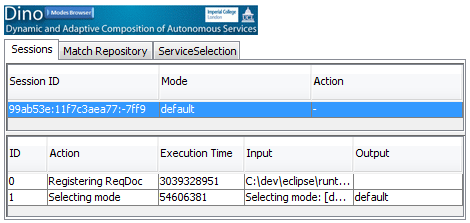
| 4.2. | Drag and drop the reqdoc.xml file (created in step 3.7) on the Dino Console View. Note a new session is created and the requirements document loaded. |
| 4.3. | When the requirements document has finished loading, select the Session ID and note the actions taken. |
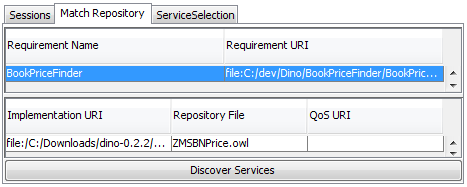
| 4.4. | Switch to the Match Repository tab, select BookPriceFinder under Requirement Name and note the Repository File used for service matching. |
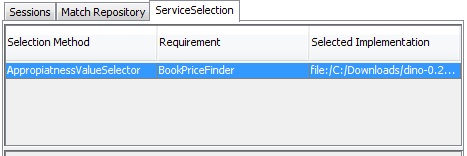
| 4.5. | Switch to the ServiceSelection tab and note the method for service selection. |
| 5. | Test the Requirements with the BookPriceFinder demo |
| 5.1. | Locate or open the BookPriceFinder demo View (Windows à Show View à Other à Dino à BookPriceFinder Demo). |
| 5.2. | Under the broker group click select and choose the Dino session id created in step 4. |

| 5.3. | Under the Select Book group select a book from the drop down list box. |
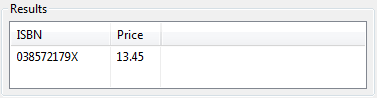
| 5.4. | Note that the ISBN number for the book is updated in Search group below it. |
| 5.5. | Click Search, and note the results from the service invocation. |